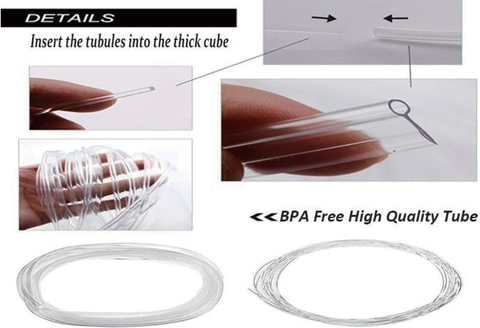
First Step : Light Strip Insert Into Tube Holder (2.0 diameter installation)
Important Note:
Professional installation is recommended!!!!
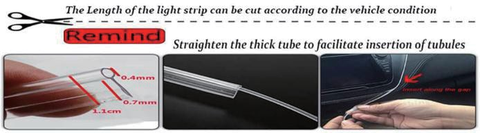
- The tube holder and light strip can be cut according to the length,Please measure the length of the installation position.
- After cutting the light strip and the tube holder according to the length you had measured,Insert the light strip into the tube holder,please be careful not to bend or crease the light strip, which will result in poor light effect.
- The maximum bending angle: can not be Less than 90°angle (<90 °, Can not be an acute angle), to avoid causing light cannot transmission.
- If the light strip’s length is more than 1.2m, What you need to do is used two light sources to match with both end of light strip ,that can make a perfect lighting effect. The longest distance for best light effect of light strip is 1m to 1.2m.
- The position of the light source should be selected in a line with the light strip to help achieve the best light effect .Avoid installation in corners.
Product Specifics
- Theouter layer is made of Teflon material, and the core layer is made of transparent polymer optical
- Applicable temperature:-10℃~70℃
- Minimum bending radius: 8 timesdiameter
- Maximumbending angle: cannot be less than 90°angle (<90°angle, cannot be acute angle)
- Optical loss:650db/km
- Wavelength range:380-780nm
- Maximum incidence angle:75°
- The outer layer refractive index:402
- Core layer refractive index:516
- Maximum conduction distance: 0m<2m, the best conduction distance is 1m to5m
- Light source power: 1.5watts/piece
- Light source power: 1.5watts/piece
- Take USBconnection
- 5050 RGB LEDChip
- Voltage:DC12V
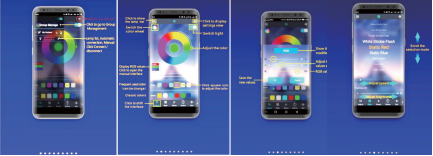
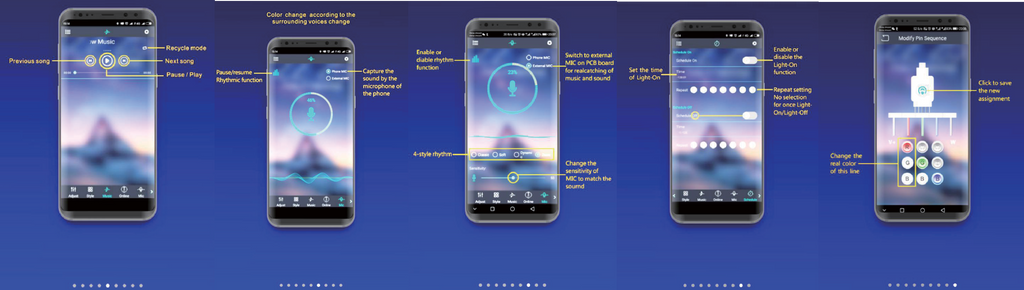
Second Step : Bluetooth APP Download & Using Guide
- APP can be suitable for Android system and IOSsystem
- Scan product QR code todownload
Main installation Position:
Professional installation is recommended!!!!
- Seam of instrumentpanel
- Seam of Car centerconsole
- Car doorSeam
- Seam of armrestbox
- Front seat backgap
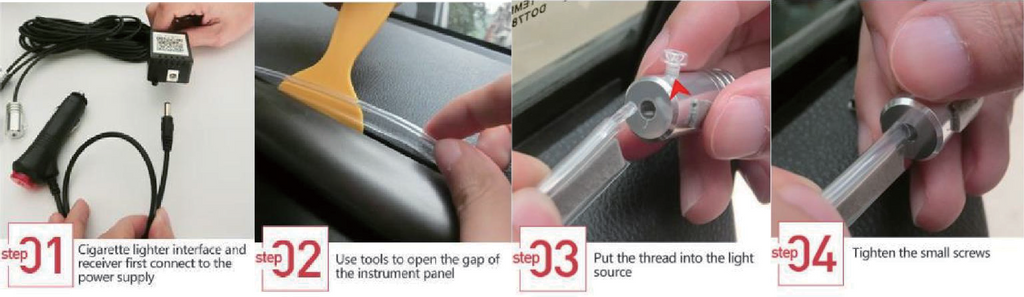
Third Step: Installation